Custom Domains
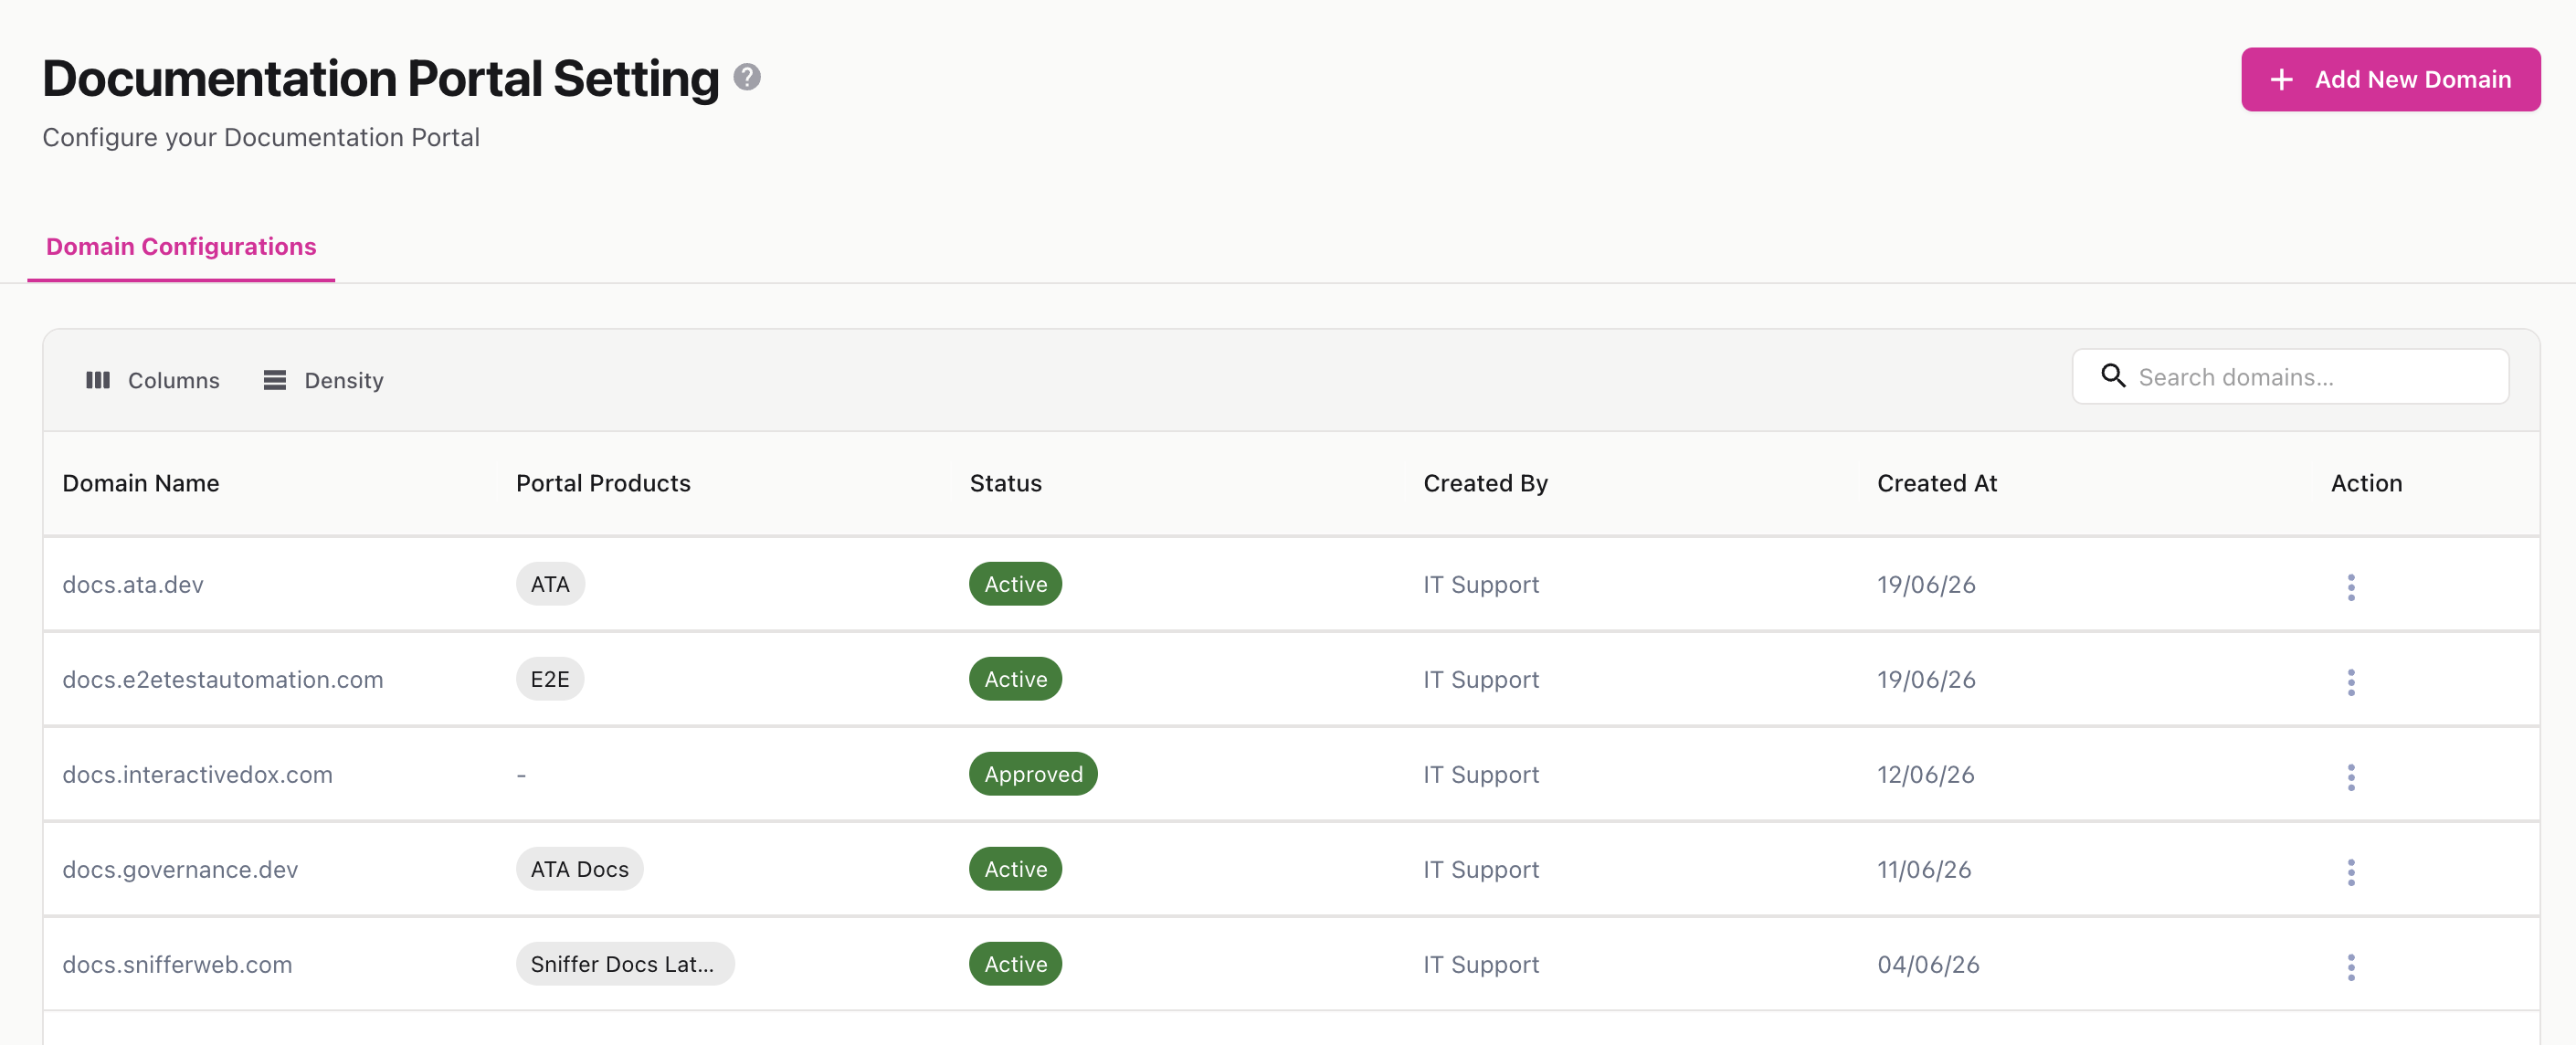
Serve your documentation portal on your own web address — like docs.yourcompany.com — instead of the default InteractiveDox URL. This guide covers the full flow: adding a domain, verifying it, and attaching it to a portal.
Config page: /documentation-portal/settings (menu: Custom Domains)
Used in: a portal’s Product Settings → General Info tab
A custom domain is a personalized web address that puts your portal under your own brand. Setting one up is a two-part process:
Once both are done, visitors reach that portal over HTTPS at your custom address.
ℹ️ Managing domains (add/verify/edit/delete) requires domain-management permission on the workspace.
docs.example.com). It’s validated for a proper domain format.Open the domain to see the DNS records you must add at your DNS provider (GoDaddy, Cloudflare, Route 53, etc.). Each record has a copy button.
Copy each value into a matching record at your DNS provider, then save. DNS changes can take a few minutes (sometimes longer) to propagate.
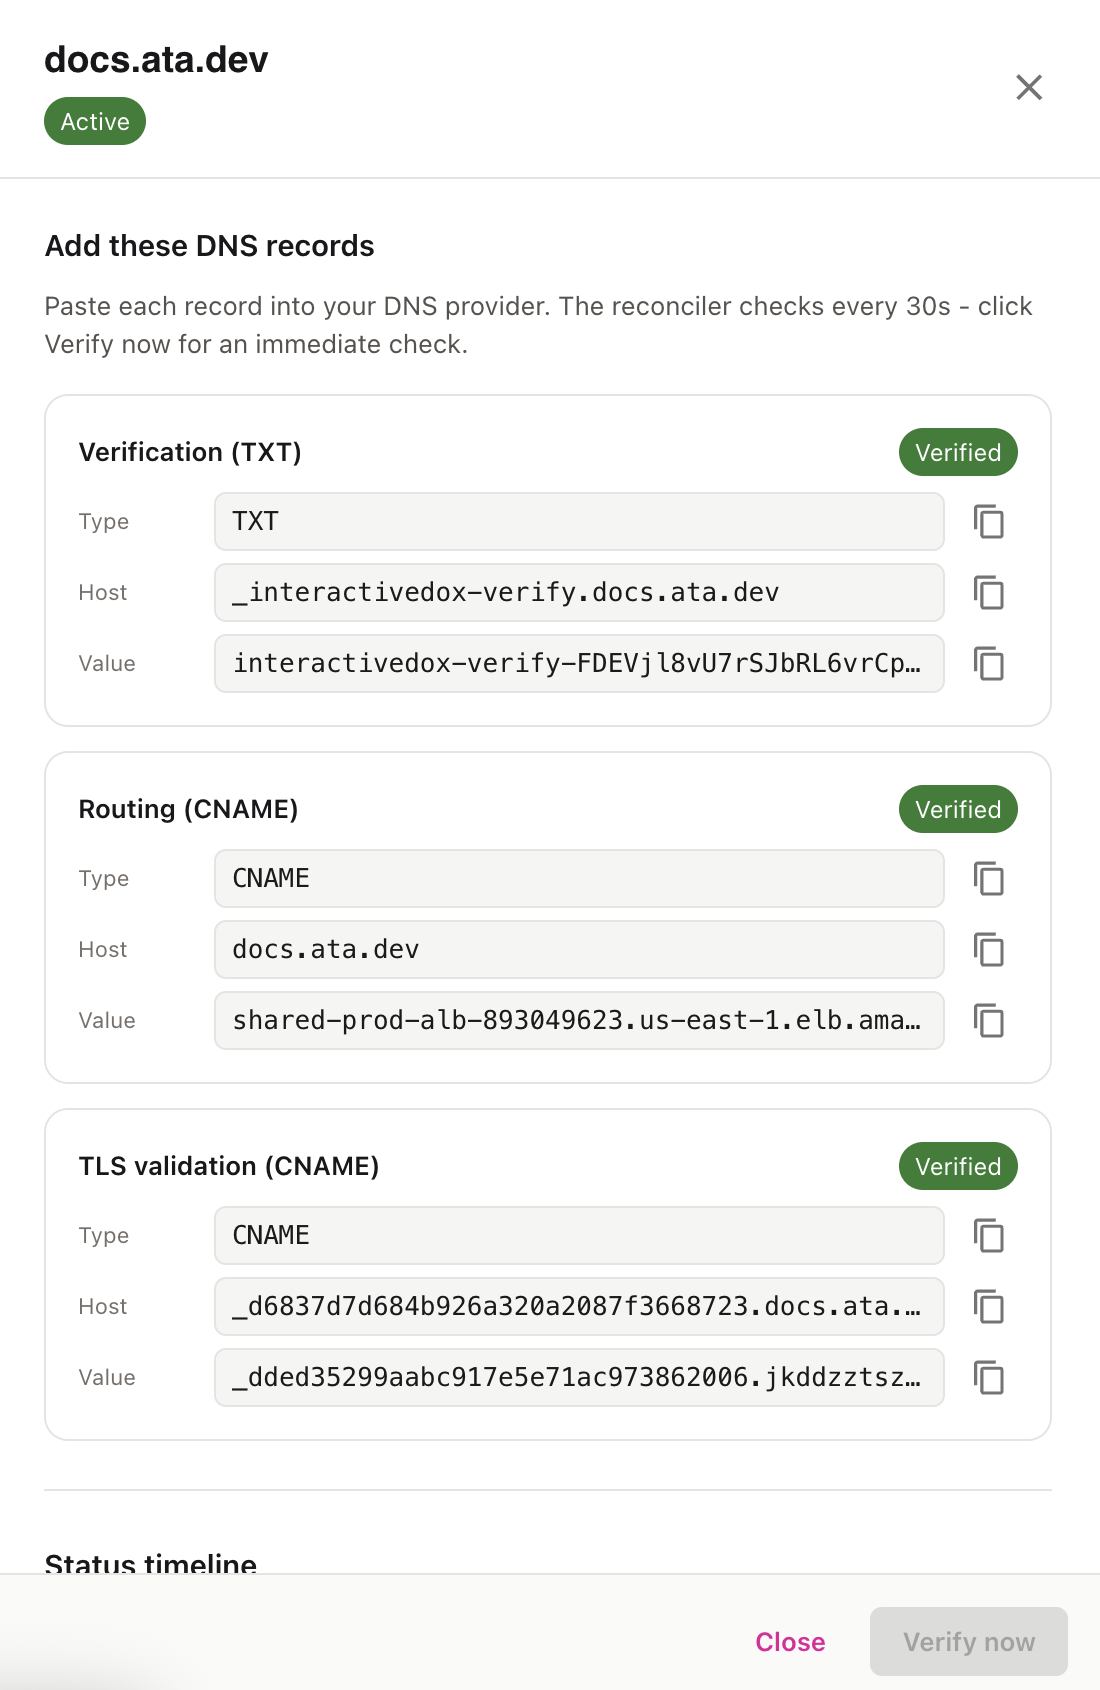
InteractiveDox checks your DNS automatically on a schedule. To check right away, click Verify now in the domain drawer (there’s a short cooldown between manual checks).
A status timeline shows progress:
💡 If a check fails, the drawer shows the reason (e.g., a record not found yet). Fix or wait for DNS to propagate, then Verify now again.
ℹ️ An Active domain’s name is locked (read-only) so a live address can’t be changed by accident.
A verified domain only goes live once you connect it to a portal:
ℹ️ One domain, one portal. Each portal uses a single custom domain, and each domain can be attached to one portal at a time. To move a domain, switch the selection on the new portal (it’s released from the old one on save).