PortalCreate a Portal
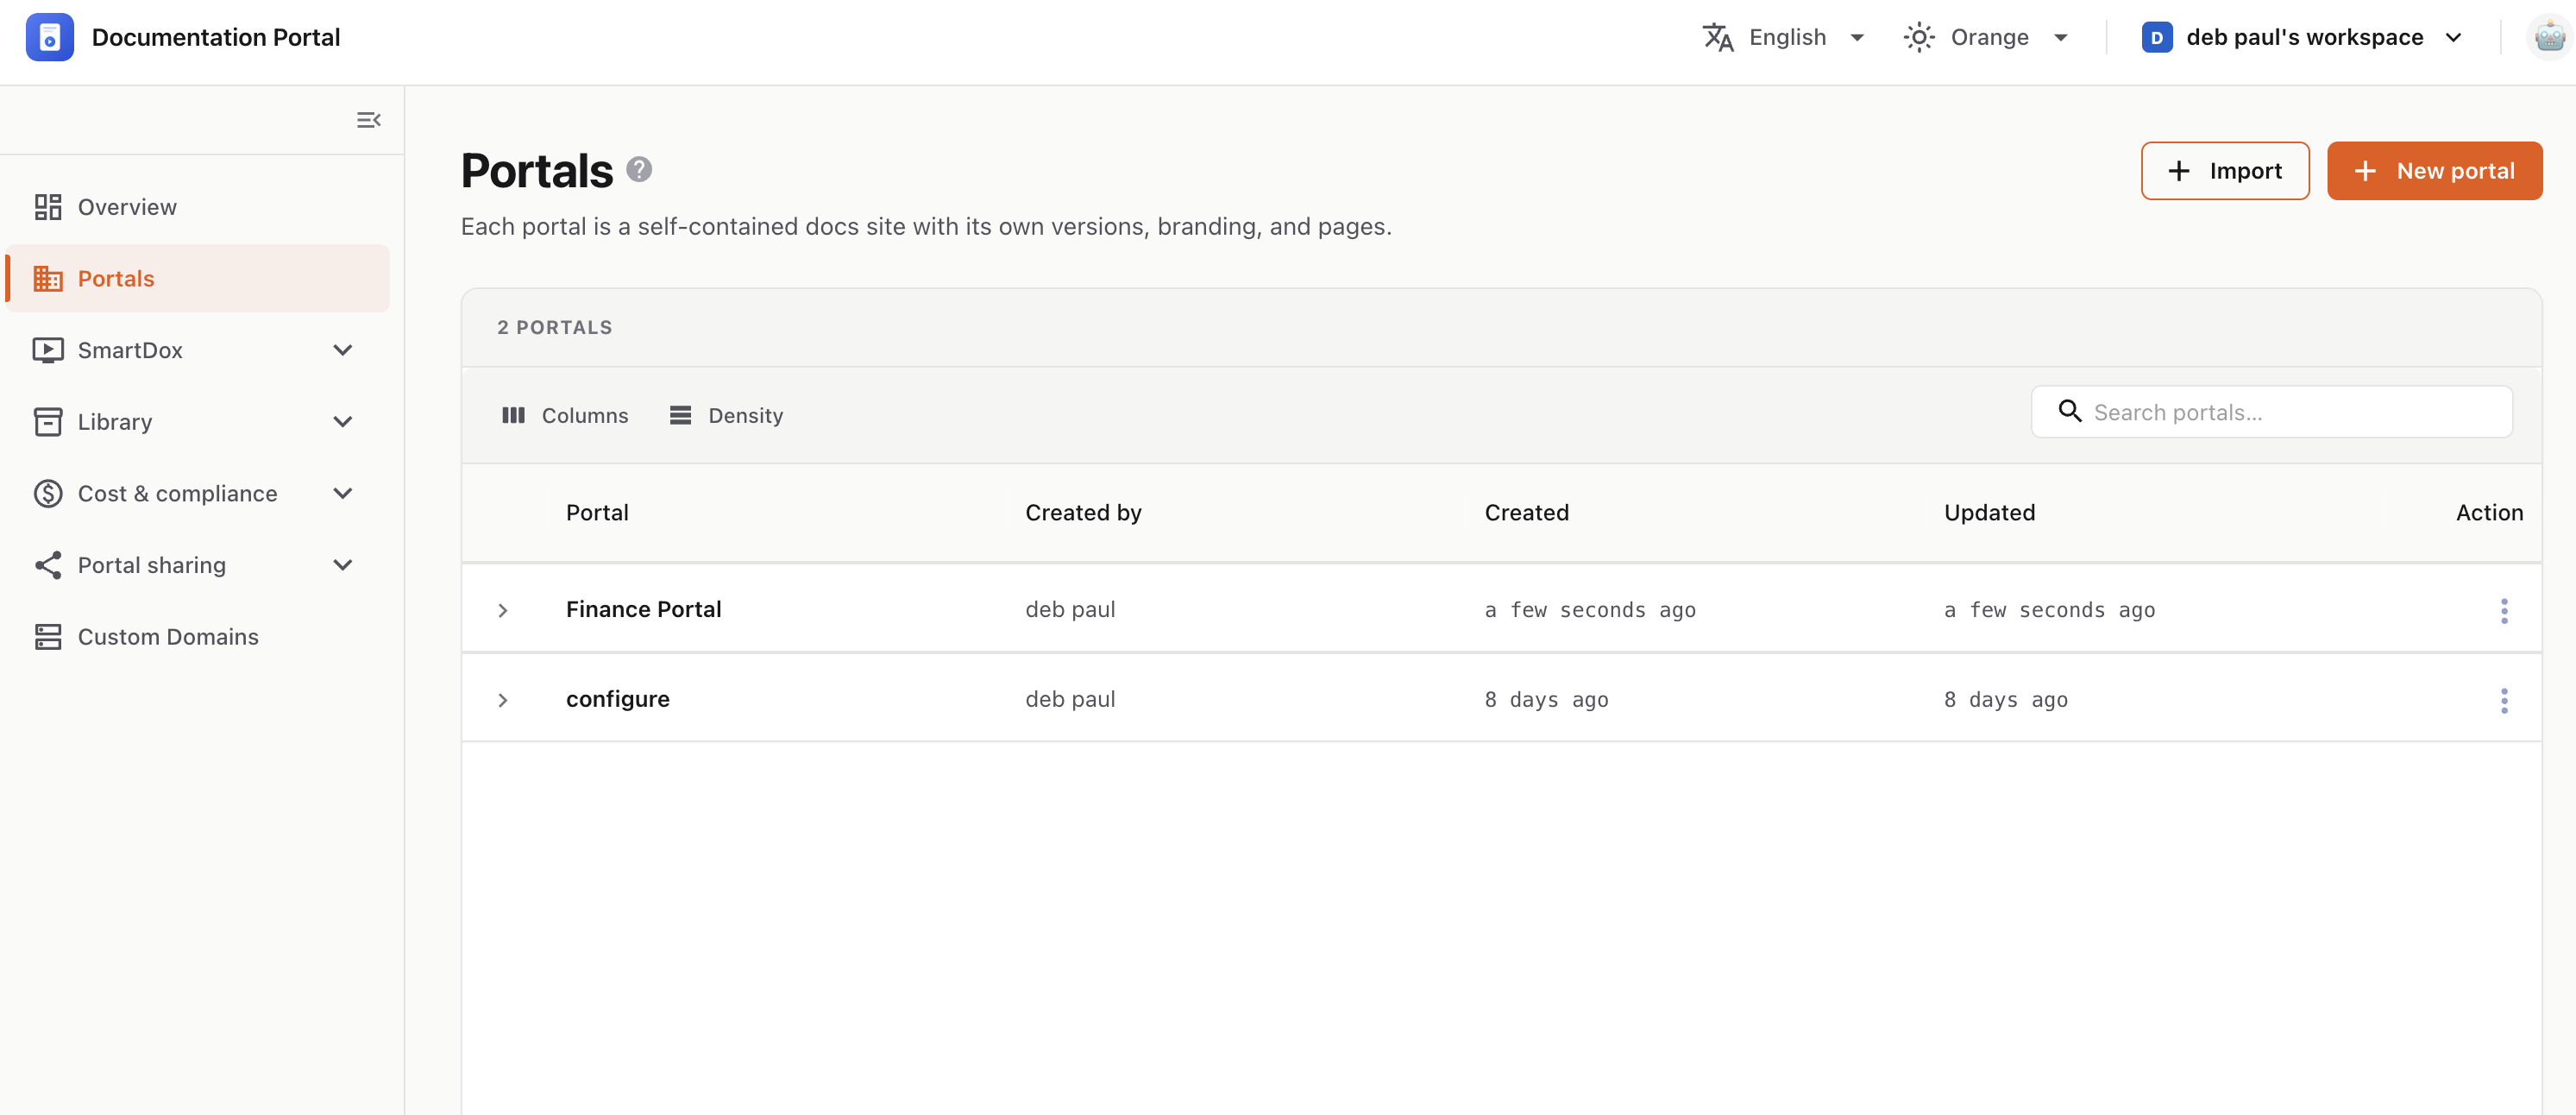
A portal is a self-contained documentation site with its own URL, branding, users, and versions. This guide walks you through the Create a new portal wizard, step by step, so you can launch your first docs site in a few minutes.
Each portal is a standalone documentation hub that your developers and partners visit. Every portal has:
| What it means |
|---|
| 🔗 Its own URL | A unique address like docs.interactivedox.com/partners (custom domains supported later) |
| 🎨 Branding | Its own brand color, tagline, and header identity |
| 👥 Users & access | Its own reader list, SSO rules, and access settings |
| 🗂️ Versions & pages | Its own set of documentation versions, each holding many pages |
You can create as many portals as you need — one per product, partner tier, or audience.
💡 The wizard has 3 steps — Name & template, Access, and Branding. A progress bar at the top shows where you are. You can move ← Back at any point, and every setting can be changed later, so nothing here is permanent.
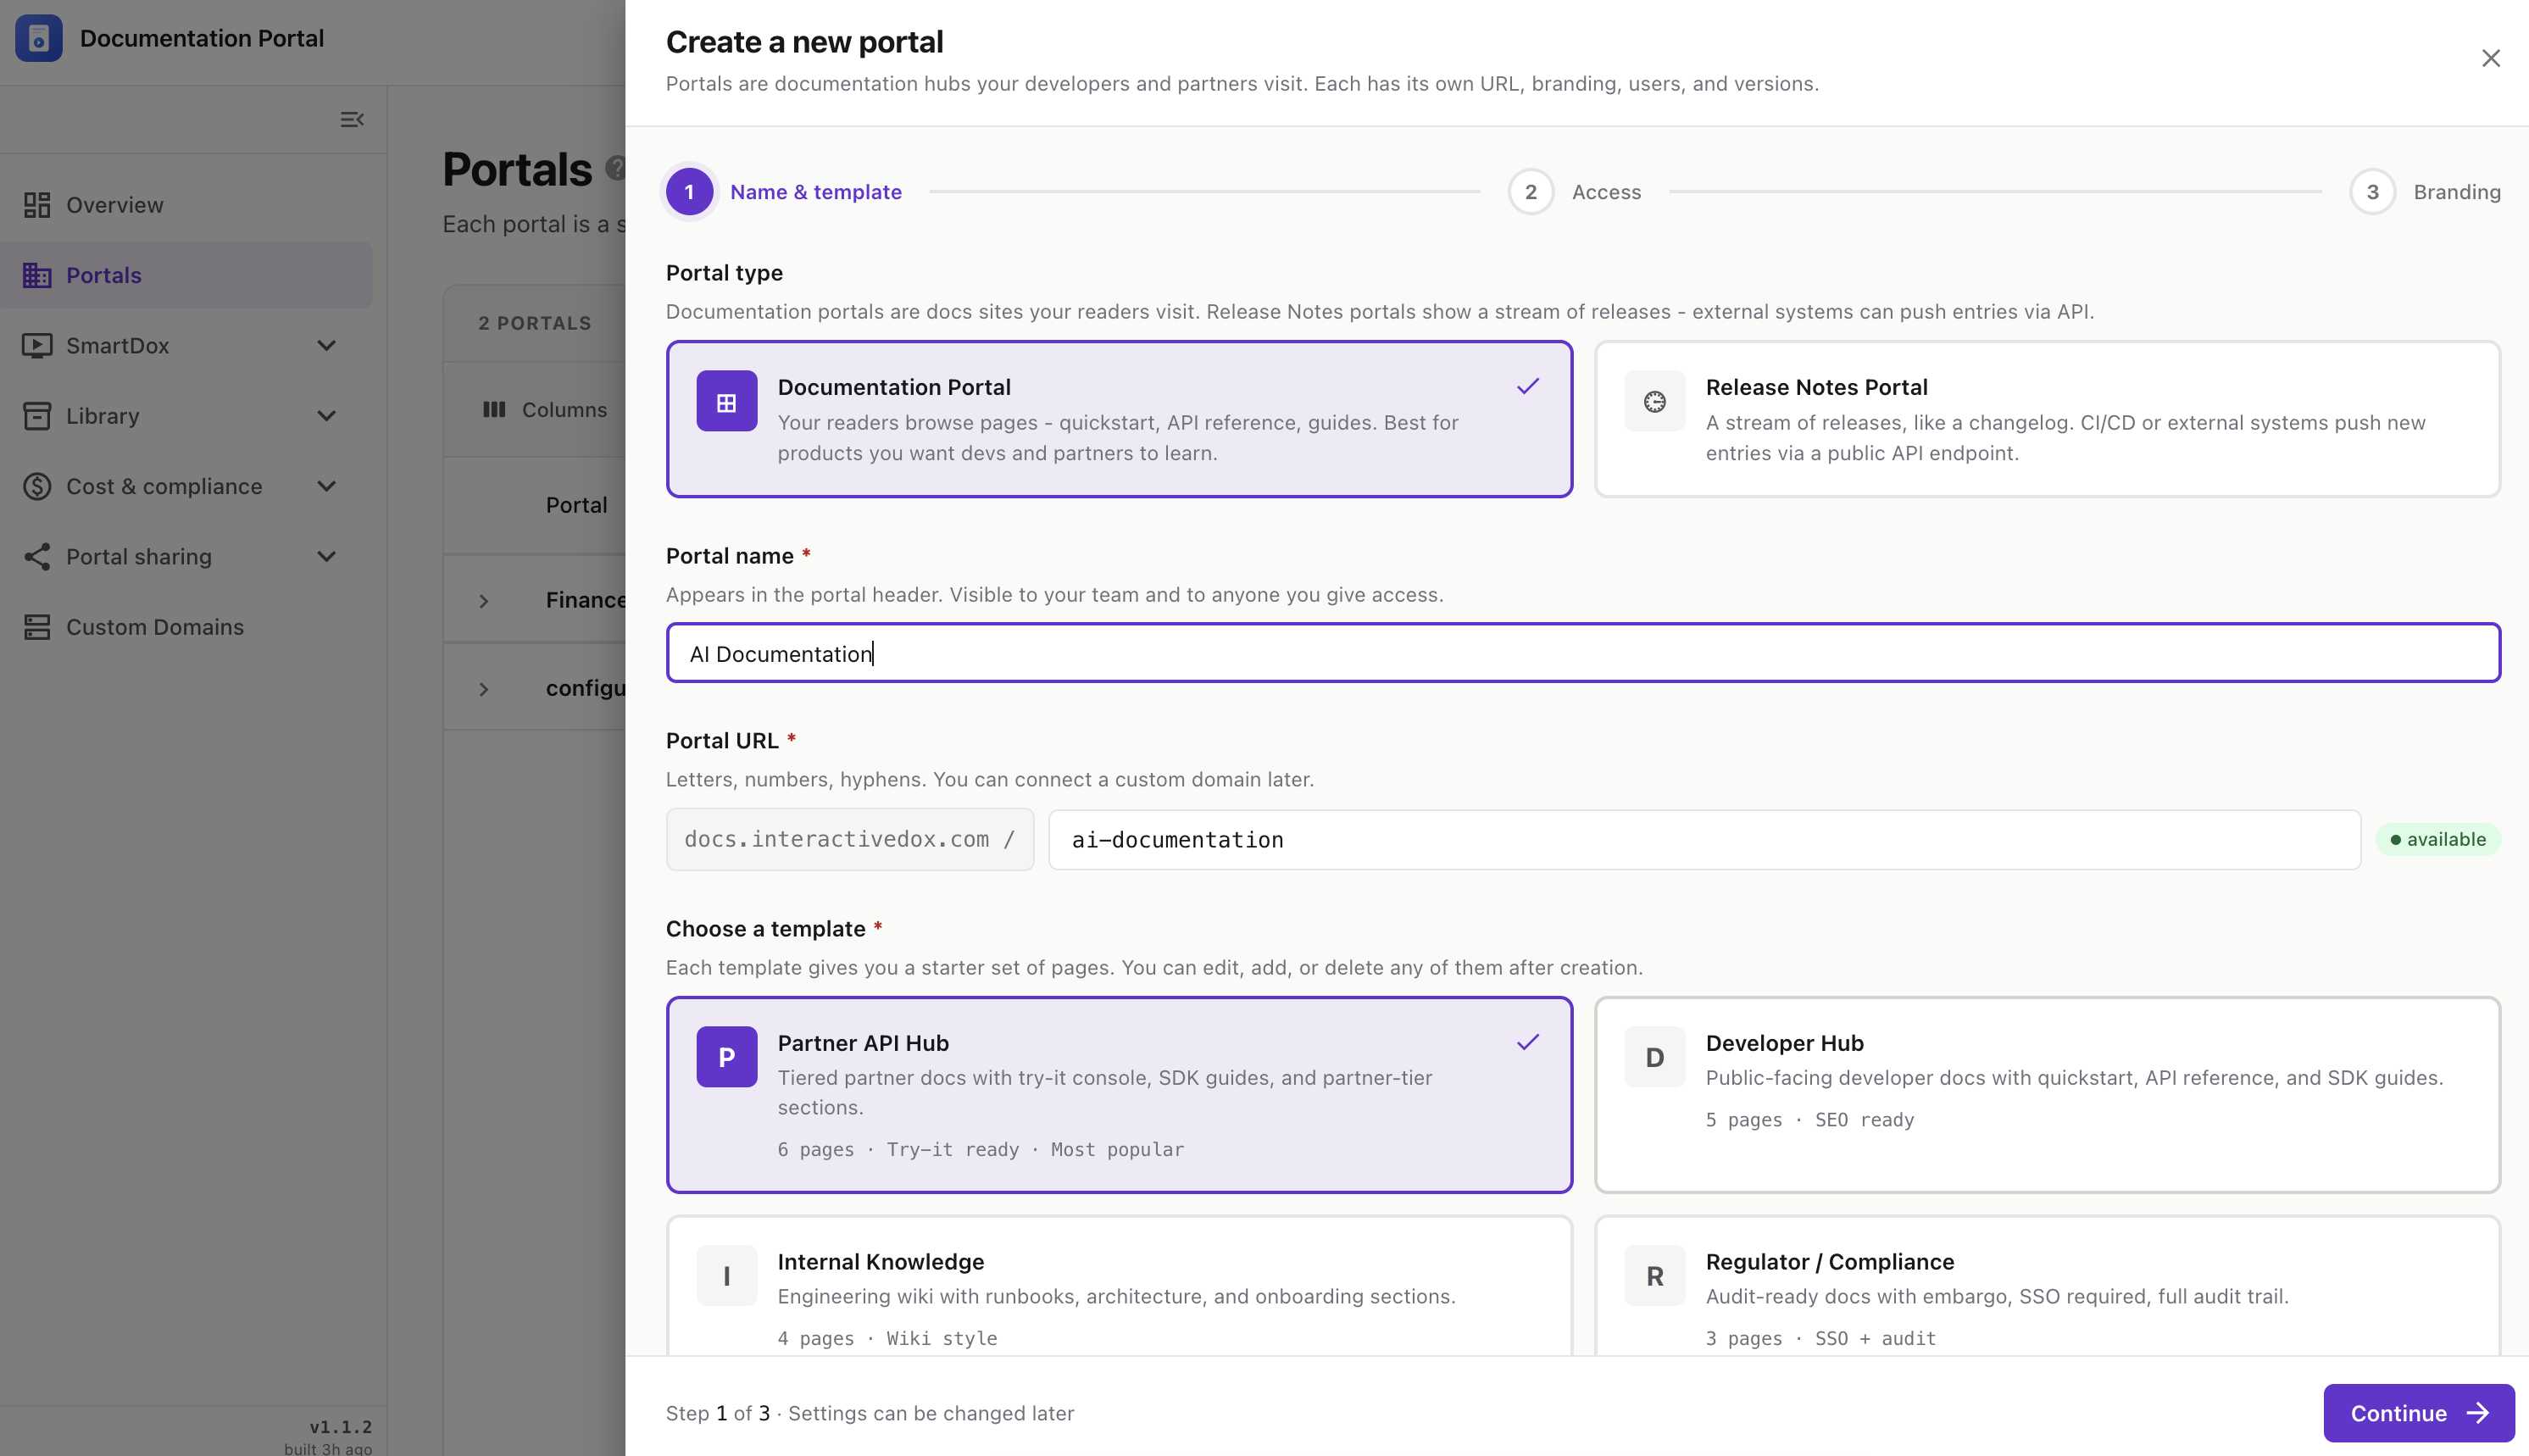
This first step decides what kind of portal you are building, what it is called, its web address, and which starter pages it ships with.
Choose what kind of site this portal is:
The name that appears in the portal header. It is visible to your team and to anyone you give access to.
Partner API HubThe web address readers use to reach your portal. It sits after the base domain — for example docs.interactivedox.com / partners.
⚠️ You cannot continue until the name and URL are filled in and the URL shows as available.
Each template gives you a starter set of pages so you don’t begin with a blank site. You can edit, add, or delete any of them after creation.
Documentation Portal templates:
ℹ️ If you selected the Release Notes Portal type instead, you’ll see release-notes templates — Public release notes, Internal changelog, and Customer updates — each of which seeds changelog-style pages and configures the public API endpoint for posting new entries.
Choose how your starter pages are authored. You can change this per page later — every page picks its own editor when it’s created.
When everything is set, click Continue.
This step controls who can read the portal and the default rules applied to users you invite.
Turn this on to let anyone on the internet read this portal without signing in. Most internal portals leave this off and add specific users instead.
Default settings for users you invite to this portal. You can override any of these per user later.
Click Continue when your access rules look right.
The final step sets your portal’s visual identity. A live preview on the right updates instantly as you make changes, so you can see exactly how the portal header, sidebar, and buttons will look.
The primary color used for buttons, links, and highlights across your portal. Pick one of the 9 preset swatches, or use the custom color picker to enter an exact hex value.
An optional short line shown under your portal name. Keep it under 60 characters.
Build payments integrations with us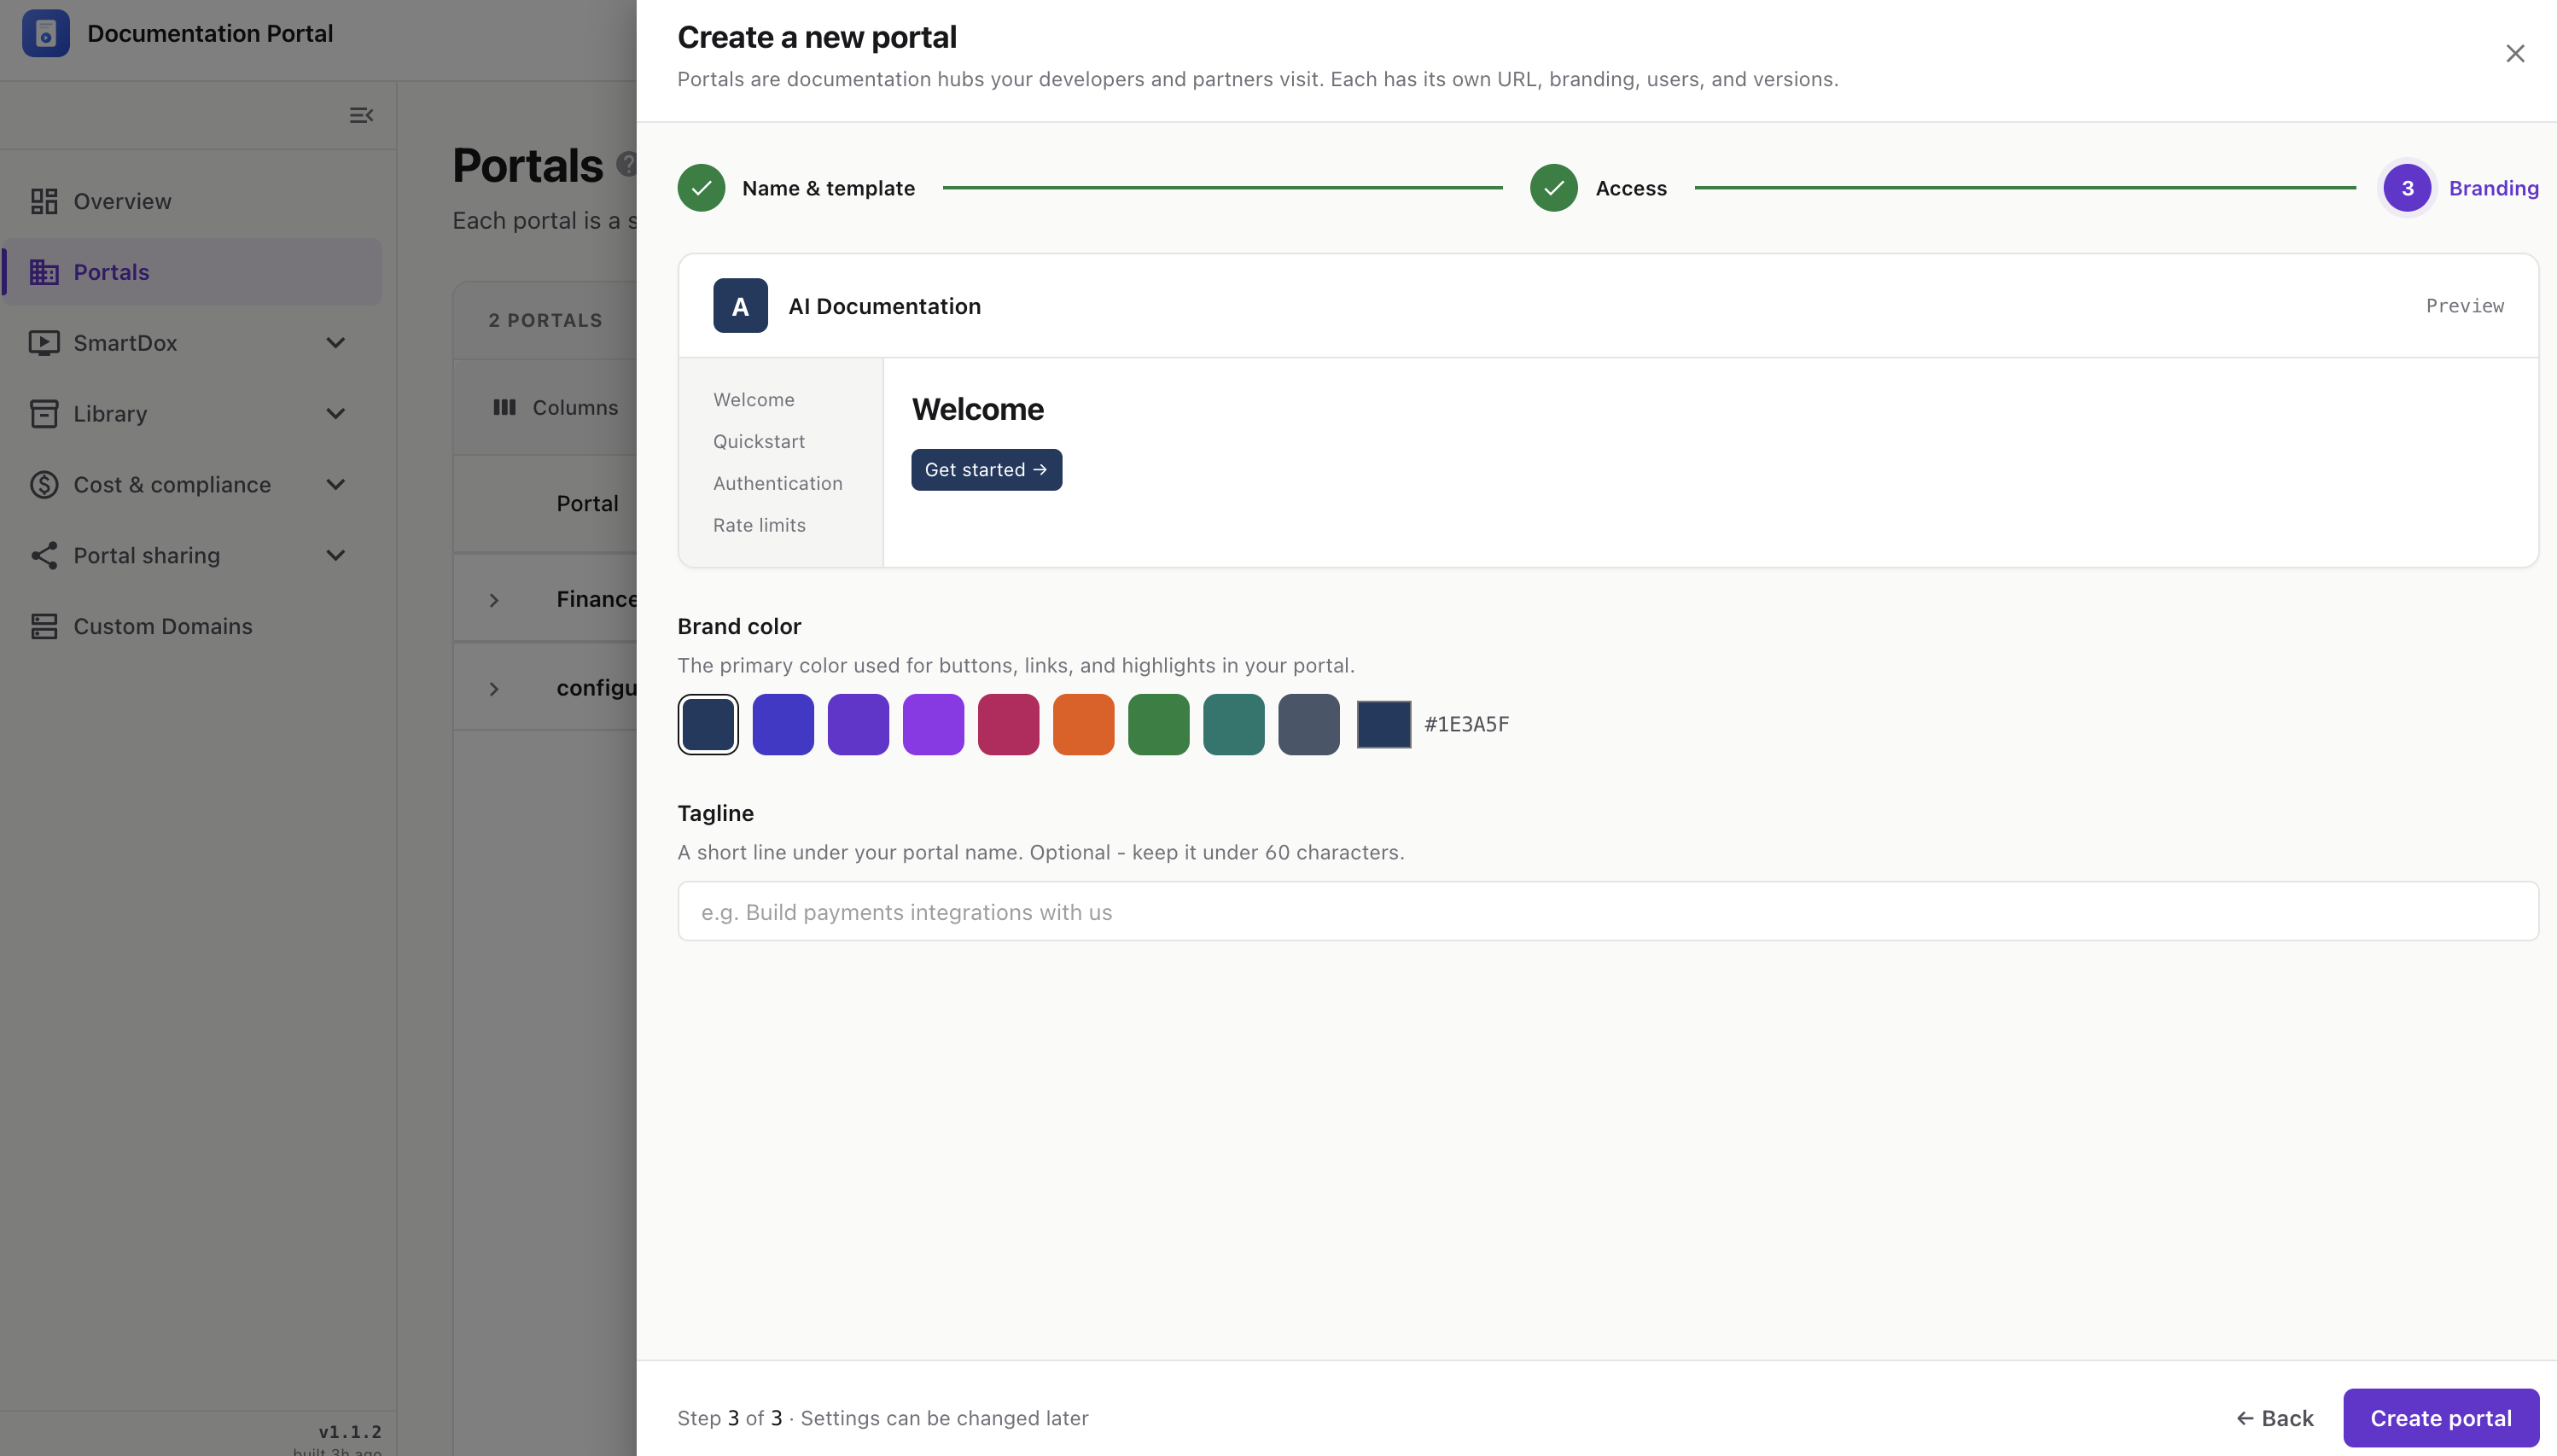
When you’re happy with the preview, click Create portal.
Once you create the portal, a success screen confirms it’s ready:
💡 If you built a Release Notes Portal, this screen also shows a Push release notes via API callout with a ready-to-copy curl example and a pointer to your API keys under Settings > Integrations > API keys.
🖼️ Insert image of the Portal created success screen with the green check and the Open portal button.
Your portal now exists with its starter pages. From here you’ll typically:
v1, v2).Tip: Everything you chose in this wizard — name, URL, access rules, branding — can be changed later from the portal’s settings. Start simple and refine as you go.